Monday, December 7, 2009

Winterizing


Here is a cute picture of Honey, she has had a long summer learning the ropes of being a mouser for Marble Family Farms. She still has yet to catch a mouse (as far as we know), but training was rigorous. Now she gets to take the winter off.


We have ordered the greenhouse and it is on its way. The ground posts have been pounded into the ground, and the skirt has been buried.

You can see that we are just adding 50 feet to the old greenhouse. The skirt is the white plastic that is low to the ground extending from the old greenhouse. The skirt is buried at least 6 inches, and is attached to the "knee wall". It just acts as a barrier from frost. The plan is to keep the front of the old greenhouse intact, and then move it forward. Then we will take the plastic off of the old greenhouse (it needs to be replaced anyway), put up the rest of the bows, purlins and truss braces, then plastic the whole thing over... Easy as pie!

We do have snow. About an inch that hasn't gone away, and there is more coming tonight. The sheep seem to love it! Every time I let them out of the barn, they run and prance like spring lambs.

If you have some time on Saturday, stop into the new indoor farmers market at the West Farmington Grange. We are open from 10am to Noon.

Hope to see you there...

Stay warm and eat well!

Saturday, November 21, 2009

New Greenhouse!

We have made the decision to put up a new greenhouse. We could get it up in the matter of a week if it was all we were doing. We have ordered the parts that need to go into the ground before it freezes, then the rest can go up at our leisure.

We have put up two greenhouses already, both from Rimol Greenhouse Systems in Hooksett New Hampshire. We did some price shopping before we started our first greenhouse project and they were the best we could find. I don't know if it is the best deal out there, but their customer service has been outstanding, and we have stayed with them because of that.

The first greenhouse we put up was 50'X34' and was erected in the fall of 2006. We were fairly inexperienced, and had a few mishaps... okay, just one major mishap. The greenhouse fell over. But it was our own fault, and we learned from our mistakes.Here is a picture of Andy putting up one of the bows that is the main structure of the old greenhouse.


In the summer of 2009 we put up a 100'x30' greenhouse. This greenhouse holds heat better because of its bigger size, and because it has two layers of plastic that are blown up like a balloon with a small fan. Here it is, you can see the old greenhouse in the background.


Our plan now is to add another 50' to the old greenhouse. It has been 3 years now and it's about time to change the plastic anyway... so why not! It will give us an opportunity to fix the drainage of the garden below the site. The onions in that plot this year stayed in a permanent puddle.
Okay okay, so all of that is boring! Here is a nice recipe for you. I made it for company the other day and I think they liked it. She asked for the recipe anyway!
Roasted Garlic and Butternut Squash Soup

Ingredients:
Soup
2 garlic bulbs, outer papery skin removed
5 Tbl. Olive Oil
Thyme
1 Large butternut squash
2 onions, chopped
1 tsp. coriander
5 Cups vegetable stock
1 Tbl. Oregano
Salt and Pepper to taste

Salsa
4 large ripe tomatoes, halved and seeded
1 bell pepper, halved and seeded
1 large chili pepper, halved and seeded
2-3 Tbl. Olive oil
1 Tbl. Balsamic vinegar
Pinch of sugar


1. Preheat the oven to 425F. Place the garlic bulbs on a piece of foil and pour over half the olive oil. Add a pinch of thyme, then fold the foil around the garlic bulbs to enclose them completely. Place the foil parcel on a baking sheet with the butternut squash and brush the squash with 1 Tbl. olive oil. Add the tomatoes and peppers for salsa.

2. Roast the vegetables for 25 minutes, then remove the tomatoes, peppers and chili. Reduce the temp. to 375F and cook the squash and garlic for 20-25 minutes more, or until the squash is tender.

3. Heat the remaining oil in a large, heavy pan and cook the onions and ground coriander gently for about 10 minutes, or until softened.

4. Peel the pepper and chili and process in a food processor or blender with the tomatoes and 2 Tbl. olive oil. Stir in the vinegar and season to taste. Add the remaining oil if you think the salsa needs it.

5. Squeeze the roasted garlic out of its papery skin into the onions and scoop the squash out of its skin, adding it to the pan. Add the stock, 1 teaspoon salt and plenty of black pepper. Bring to boil and simmer gently for 10 minutes.

6. Stir in half of the oregano and cool the soup slightly, then process it in a blender or food processor. Alternatively, press the soup through a fine sieve.
Serve with sprinkle of oregano and scoop of salsa.
Enjoy and Eat Well!

Sunday, November 8, 2009

End of Summer and Fall in a nutshell

This summer has gone by really REALLY quickly. First there was the end of August rush with lots of veggies. The rain finally stopped (phew!!), the gardens dried out... and ohh my goodness the weeds had taken over!! It was like we had never done any weeding at all! All of that weeding was done for seemingly nothing! But we got it cleaned up.. for the most part. We lost about 20 feet of carrots, all of our parsnips, and our onions to weeds... all of which were sitting in a big lake for the first half of the summer!


The green beans did amazing this year! And, at least we were lucky enough to have tomatoes! We harvested tomatoes until October 28th this year thanks to our greenhouse. In fact, we are still ripening off tomatoes and selling them at the farmers market! They are not vine-ripened, but they are still delicious.


September is fair month in Maine. We only set up at the Farmington Fair, but that takes up a lot of energy! This is our farm booth this year. It was a good time!


October was absolutely gorgeous this year. The colors were so nice. The veggie season came to an end about the 2nd week in October. All we had left was storage veggies, the last of the tomatoes, and greens. The second week in October was when I told Andy at M and P's house that I thought we should get married this fall instead of waiting a year. So we called up Mom and Dad and set a date... November 1st. We were married on top of Bald Mt. in Weld surrounded by so many friends and family members that it brought tears to our eyes!


So that was the end of our summer and fall in a nutshell! It was busy, but over all amazing! Our wedding just made us realize how fortunate we are to have such great people in our lives. It is so nice to step back and think about it, and we are grateful that we had such an opportunity!

Monday, August 3, 2009

Cukes and Zucks

This is my favorite time of year. The garden is full of summer veggies, and the hearty fall crop is coming in. The golden rods and asters, some of the last wildflowers to bloom for the summer, are abundant, and the first of the blackberries are starting to ripen. There are green beans, tomatoes, cucumbers, summer squash and zucchini to harvest. The pumpkins are dark green giants that hide under large, tender foliage. The Swiss chard and beets are just getting big enough to no longer be called "baby".


This year is no different then others, except that the gardens are ungainly and out of control with weeds!! Last year we mulched many crops with hay, but decided against it this year because we didn't want the grass seed that comes along with it. I wish we had done it anyway. It was so hard to get into the garden this spring/summer to weed, and it was difficult to cultivate as the mud made it virtually impossible. So... excuses, excuses. Needless to say I will be mulching next year, grass seed or no grass seed. Lesson learned. Also, there will be an abounds of mulch hay, as that is all Richard will be able to harvest this year... what a waste.


The tomatoes are starting to ripen, only 2 weeks later than last year. The first heirloom to ripen was Black Krim... it is definitely a keeper!! Now, any fresh tomato tastes divine this time of year, but that tomato was smooth, slightly sweet, and had a tender skin.. yum yum! We tried Prudens Purple last year and were very VERY unimpressed. Our hands are always stained black this time of year because we are constantly in the tomato greenhouse, pruning branches, tying them up, and taste tasting the new varieties as they come ripe! This is an heirloom variety called muskovitch harvested today, slightly under ripe, but still beautiful!


Today we harvested beans for the first time this year. We planted three successions of two types of green beans, Provider and Tasty Jade. We harvested about 20 pounds, and are expecting to harvest about the same on Wednesday. We still haven't finished our dilly beans from last year, but we'll put some more up for this winter. Also, we just got a used vacuum packer, so we will wash up some beans and pack them with butter, salt and pepper, so all we have to do is throw the package in the microwave on a cold winter evening meal. My mom thought of that, she's such a clever lady!

Here are two quick, cool recipes for a hot summer afternoon. They would even be pretty good served together!

Gazpacho
Gazpacho is a wonderful tomato and cucumber soup that is served chilled. It is very refreshing on a hot summer day. When I make this soup, I leave the seeds in the cucumbers and the tomatoes whole. There are a lot of vitamins in the seeds!! It also saves some time.
Soup
3 large cucumbers, peeled and seeded
3 large tomatoes, peeled and seeded
1 bell pepper
1 tablespoon minced garlic
Juice and grated zest of 2 lemons
2 tablespoons red wine vinegar
3 tablespoons chopped fresh cilantro
3 tablespoons chopped fresh basil
1 teaspoon ground cumin
2 teaspoons salt
Freshly ground black pepper
Lemon Sour Cream Topping (as garnish)
1/4 cup sour cream
Juice and grated zest of 2 lemons
1 teaspoon salt
Freshly ground black pepper


Put all ingredients in soup recipe in a blender. Blend until smooth. Transfer to a large container with a cover and chill until serving time. For topping, place the sour cream, lemon juice, zest, salt, and pepper in a small bowl and whisk to blend. Refrigerate, covered, until serving time.To serve, stir the gazpacho to blend the components, and then ladle into chilled bowls. Top each serving with a dollop of the lemon sour cream.

Cucumber and Cream Cheese Sandwich
Very quick, yet extremely satisfying. Eating one of these makes me think of road trips to Tennessee in a stuffy old station wagon with mom and the four of us kids, with no air conditioning... She's the best.

Bread
Cucumbers
Cream Cheese
Fresh Chopped Dill
Salt and Pepper to Taste

Spread Cream cheese on one piece of bread. Slice cucumbers very thin, then stack as much as you want on top of cream cheese. Sprinkle a little dill, salt and pepper on cucumber. Place another piece of bread on top… Enjoy!

Thanks for reading and Eat Well!!

Tuesday, July 21, 2009

Summer at last!

I haven't written in a while, I apologize! We have finally had some sunshine here in Farm-town. A lot has happened since the last time I wrote. The biggest news is that I have 3 new sheep! Their names are Ramona, Amelia, and Beatrix. They are Corriedales, a mom and 2 babies. The two lambs have black spots on their noses, feet, knees, ears and the tops of their heads! So sweet! I got them so that they would eat grass, poop, and grow nice clean wool!

Here is a picture of them. Ramona, the mother is the big one with the white nose looking right at us. Bea is hiding in the background, and Amelia, as always, is in the front.


I still have a lot to learn about raising sheep. I need to trim Ramonas hoofs soon, but first I need to learn how to flip her over on her rear end. Bruce at Guinea Ridge Farm where I bought them made it look so easy! I still haven't done it successfully. Those 150 lb. creatures can push me around just as easily as I can push them around! They are very gentle animals, and I haven't felt nervous around them at all. They are very friendly and Baaaaa every time they see us. They seem very happy in their new home.


As for the gardens, ours are full of weeds. It's okay, because they are being held at bay more and more with every day of sunshine that we have. It is so nice to finally get out into the gardens. Yesterday we spend the afternoon weeding potatoes and picking potato beetles. Potato beetles are very easy to take care of. We just put some alcohol in an old glass jar, and knock the beetles and plump larvae off the leaves into the alcohol.

Here are some All Blue Potato flowers, I think that they are really beautiful!


The new veggies that we have available are cabbage!! Carrots, bunching onions, peas (FIRST COME FIRST SERVE, SO ORDER YOURS SOON!!), lots and lots of basil and parsley. As always, we have salad greens. The summer squash was looking sad in that mud puddle, but is drying out, and hopefully we will have some ready to harvest soon. Last year we were harvesting squash July 13th. This year we're a little late! Cukes are not too far behind. Tomatoes are starting to blush, but are not quite there yet.
Here is a recipe that I love! This will turn you on to cabbage if you think that you're not a fan. Use purple cabbage, and it makes a beautiful side dish, good for any occasion!
Baked Cabbage with Garlic
The Mediterranean Vegan Kitchen
Makes 4 servings

Ingredients:
1 Small Cabbage – outer leaves removed, cored, and quartered
1 ½ Tbl. Extra Virgin Olive Oil
2 Cloves Garlic
¼ Cup vegetable broth
Salt and pepper to taste

Directions:
Preheat the oven to 425F. Lightly oil a deep-sided baking dish.

Fill a medium stockpot or saucepan large enough to hold a 9 inch steaming basket with 1 inch of water. Place the steaming basket in the pot and add the cabbage. Bring to a boil over high heat. Cover tightly, reduce the heat to medium, and steam until softened but not limp, 7 to 10 minutes. Carefully transfer the cabbage to prepared dish; set aside.

In a small saucepan, heat the oil over medium-low heat. Add the garlic and cook, stirring, for 2 minutes. Spoon the oil mixture evenly over the cabbage quarters. Add the broth to the dish and season the cabbage with salt and pepper. Cover the dish tightly with a lid or foil. Bake for about 20 minutes, or until the cabbage is tender through the center when pierced with the tip of a sharp knife. Serve hot, with the cooking liquid spooned over each portion. Enjoy!!

Per serving:
101 Calories
5g Protein
6g Fat
1g Saturated Fat
0mg Cholesterol
10g Carbohydrates
5g Dietary Fiber
128mg Sodium
Thanks for reading, and eat well!!

Saturday, July 4, 2009

Still raining? That's okay becasue we're jamming!

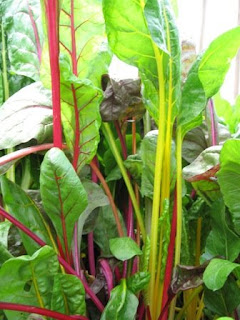
Okay, it is STILL raining!! This is week five of nothing but rain. Thank goodness for the 2 hours of sunshine that we got for our 4th of July BBQ. Hopefully this rain is not wreaking havoc on your garden! Blight can become a big problem when it is so wet.
This is a picture of this years blight that I found in the MOFGA news letter.


It seems that this year in particular there is a very nasty case of blight going around. If you see any signs of slimy, moldy, black spots on any leaves, stems or fruit, immediately pull up the plant without touching any plants around it, put it in a trash bag, throw it in the garbage (NOT the compost) and wash your hands! There is little you can do to prevent blight in this kind of weather, but it is a good rule of thumb to try to stay out of the garden when it is wet... if at all possible!
On the agenda today was to put up some Strawberry Jam! One of the benefits of farming is that there is always something to eat. To ensure that we eat during the winter, we do a lot of canning, drying and freezing of fruits and vegetables. I thought I would give a canning primer using strawberry jam since it is so darn easy!


Here is a picture of some of the items you should have ready before you begin.


Look for an aluminum canner at any farm store, or even Renys (if you're in Maine). I bought one that would just fit pint jars because it was cheaper... I wish I had the bigger one now! Wide mouth quart jars would be perfect for pickled beets and canned whole tomatoes.


From left to right, the items are, plenty of clean towels, more clean jars then you think you will need, new jar lids, a canner with a basket, jar tongs and a magnetic wand. The thing that I am missing in this picture is a jar funnel. You can get the tongs, wand and funnel in a package together just about anywhere you can get jars. Also you will need the screw bands for the jar lids.


Tips for successful jamming!


Read through the instructions carefully. I use the recipe that I find in the box of pectin, but you can use whatever recipe you want. Just make sure that you follow a recipe. My favorite canning book is Ball Complete Book of Home Preserving by Judi Kingry and Lauren Devine. You can find it on Amazon.com for about $15. It has all kinds of unique hot water bath canning recipes.


After reading the recipe and instructions carefully, get all of the equipment and ingredients that you will need together before you start. This will make jamming so much easier.


Start with a very clean kitchen, because when you are done jamming, your kitchen will be sticky mess with lots of big sticky dishes and rags piled up. You will just get frustrated if there is extra stuff in the way.


Measure all of your ingredients out EXACTLY. If the measurements are not exact, your jam will not "set up". This means that you will have strawberry sauce rather than strawberry jam. It happens to us all at one point or another.


Keep some butter and a clean knife handy. If your jam starts to get to foamy at any point, stir a little dab of butter into the hot jam mixture, the foaming will subside. This is the same trick that people use when boiling down sap to make maple syrup in the spring... pretty clever!


Always sanitize more jars than you think you will need. It is such a pain to realize that you need another jar when you're almost done!


Strawberry Jam


This recipe would be most helpful for first time canners. You probably don't need all of this info if you are an avid canner. I have lots of pretty pictures, but for some reason they won't load, so I will have to try again later...
This recipe makes about 8 cups of Strawberry Jam.

Ingredients:

2.5 quarts strawberries

7 cups of sugar

1 package of powdered pectin such as "Sure Jell"


Thoroughly wash and destem the strawberries. Cut off any soft parts of the berries.


To sanitize the jars, fill the canner about 3/4 full of water. Cover and bring to a boil over high heat. Using the jar tongs, place 10 half pint jelly jars into the water, cover, and let the water boil for 1 to 5 minutes.


Use tongs to carefully lift the jars from the water, place upside down on clean towel and set aside until ready to use. You can use a dishwasher to sanitize your jars instead of boiling them. Just run them through the dishwasher ahead of time, leave them in the dishwasher until you're ready to use them. If you do this, you will want to fill the canner about 3/4 full of water, cover and bring to a boil. Remove from heat. leave the cover on, and move to the back of the stove where it won't be spilled. This way the water is hot when you are ready to begin canning.


Mash the strawberries 1 cup at a time using a potato masher. Measure EXACTLY 5 cups of berries using a measuring cup made for wet ingredients into a large pot. Set aside. Put the excess strawberries in the refrigerator. Using a measuring cup for dry ingredients, measure EXACTLY 7 cups of sugar, using the straight edge of the back of a knife to scrape off the extra sugar in the measuring cup, into a bowl. Set aside.


Pour the package of pectin into the strawberries and stir. Heat the strawberries over high heat until they come to a rolling boil (the point when the liquid continues to boil when stirred). (Be ready with the butter, because if you need it, this step is usually the time) Add the pre-measured sugar to the strawberries and quickly stir it in. Bring the strawberry mixture back to a rolling boil, and let boil for exactly 1 minute, stirring the whole time. Remove from heat. Ladle off any foam into a bowl, set aside to use later as your first taste test!


Put a small saucepan on the stove with water in it. Place your new lids and the screw bands in the water and bring to a boil. Once they are boiling, set on a hot pad next to your clean jars. Have a clean towel, and your funnel, magnetic wand, and jar tongs handy. Clean up any clutter that has accumulated over the course of cooking the jam, now you're going to start canning your hot jam.


Turn over the first jar, place the funnel over the jar, and ladle the hot jam into the jar, filling to within 1/8th of an inch to the top of the jar. This is called "head space". Flip over your next empty jar, set the funnel on it, set aside. Dip the corner of a clean towel or paper towel into the hot water with the lids in it. Wring it out and use it to wipe the rim of your jar. Using the magnetic wand, take out one lid, dry the rubber gasket on the lid with your clean towel and place it on top of the jar. Screw on the screw bands until "finger-tip tight" or as tight as you can using only your fingertips. Continue filling jars using this method until all of the jam is gone.


Fill your teapot with water and start to boil so you will have extra water if you need it. Also have a mug near by so you can ladle excess boiling water out of the canner if you need to. You can set the rack to an elevated level by setting the indented hooks on the handles over the edge of the canner. Place the jars on the rack, and slowly lower them into the hot water. You need to have 1-2 inches of water over the tops of the jars. This is where the boiling water or the mug comes in. (If you don't need them, make yourself a cup of tea and have some toast and jam while your jam is processing!)


Cover and bring to a boil. Let boil on medium high for 10 minutes. Don't start the timer until the water is boiling.


Carefully lift the rack out of the water, and set to the elevated level. Use the jar tongs to lift each jar out of the water. Set jars on a clean towel about an inch apart from one another. Start boiling the next batch if needed. You will hear the lids start to "PING!" as the seals are made. Let the jars cool over night. Make sure that the lids have sealed, you can test them by pushing on the top of the lid, if it pops, you need to refrigerate that jar. Make sure to label your jam with the contents and date. You can store the jam for up to a year in your pantry.


Good luck on your next canning adventure. I hope you found my tips helpful. Please let me know if you have any good canning tips. Thanks for reading and eat well!!!


Wednesday, June 24, 2009

Keeping it All Under Control!


*To all of my gardening friends... don't let the weeds break you! You can do it!! Just keep weeding, mulching, hoeing, and don't lose hope! Even if there are a few (or even sometimes a lot of) weeds in your garden, veggies will still grow.*

I'm tired! It's been a long week, but we have been so productive! It only rained for about 20 minutes today, we got so much weeded. Monday we had some help weeding the Asparagus, and got it all done! I weeded and cultivated half of the potatoes. Andy weed-whacked around the greenhouses and gardens. We got most of the tomatoes strung up. I cleaned up the Kale beds. Ohh, it feels so good to get those things done. We are hoping that by the end of next week we will have all of the gardens cleaned up and under control... HA! I don't think that there is such a thing. Nature is always elbowing her way into my garden weather I invite her or not. I guess that's why I love my job so much.


I just thought I would update you all on how the Sandy River Farmers Market is going. The Tuesday market has been a success! On our best day we had 7 vendors. The Friday market is picking up as well. I would say the most we have had so far is 11 vendors. As the season progresses there will be more and more farmers showing up with their veggies and other goods. As of right you can find spring vegetables (greens, peas, radishes etc.), soap, beef and other meat, eggs, bread and other baked goods, potted flowers and vegetables, cut flowers, and sometimes pie.


This week we will have turnips, radishes, rhubarb, swiss chard (picture above), beets, beet greens, broccoli, kale, maybe peas, eggs, bread (multi-grain, anadama, cinnamon raisin, whole wheat, oatmeal), oatmeal chocolate chip cookies, blackberry rhubarb muffins (maybe), cinnamon rolls, and maybe I'll have enough time to make another cake!


Also just a reminder that STRAWBERRY SEASON IS HERE!! It's been a really horrible start to the season for the strawberry farmers because they have a gorgeous crop, but no one will pick in the rain. The berries are rotting on the plants! The first set of berries (the king berries) is the best, so go strawberry picking soon!


Thanks for reading, EAT WELL!


Sunday, June 21, 2009

The Bees are Swarming!

Last Tuesday (I know that's a long time ago, it's been a busy week!) I was finishing up with the baking for the afternoon market, when our friends (www.4boysonly.blogspot.com) drove in and told us that "the bees are going crazy by the barn!" Weslene has one hive and it is beside the old barn just near the driveway. So we went outside to find a cluster of bees in an apple tree not far away, they were SWARMING! Here is a picture of the swarm when we first found it.


Luckily Andy had just built a bee hive, known as a "Top Bar Beehive" (to learn more about this user-friendly, very inexpensive way to keep bees, visit the Barefoot Beekeepers website at http://www.biobees.com/). A few weeks ago, Mike and Paula told us about them, and then invited us over for bee-a-palooza. At bee-a-palooza, Paula and I stayed upstairs to make lunch, talk about...well just about everything, and watch the boys, while Mike, Andy and Forrest went downstairs to build the hives (they're so crafty!). I digress...

So, we split up, I got the camera and my bee book, Andy and Forrest got the hive, and Paula stayed with the little ones. Andy got all suited up and grabbed ladders, saws, snippers, and anything else he thought we might need. He climbed up the ladder and grabbed hold of the branch with the swarm of bees on it. I climbed up the tree (the same tree with the swarm of bees on it, only I didn't have a bee suit as we could only find one!) and sawed the branch with the bees on it. Unfortunately, it was a lovely crab apple tree that Andy's grandfather had planted. Luckily, when Wes came home, she agreed that cutting the branch was the best thing to do.


After the branch was sawed off, Andy (like a champion) carried the branch to the hive, positioned the swarm, then HIT the branch so the cluster of bees fell off of the branch and into the hive! It was amazing!


When a hive swarms, it means that there are too many bees for that one hive to support, so they start raising a new queen. When she is ready, they kick out the old queen and half of the bees go with her. The cluster of bees we found were all worker bees that were protecting their queen. Each bee filled up with honey before leaving the hive, so that they could start building a new one somewhere else (this makes it really hard for them to sting, think about how fast you move after Thanksgiving Supper!). Luckily, when we tapped the swarm into the hive, the queen fell in with the rest of the bees. It seems like they like their new home in the blackberry field next to our veggies. It has been a very damp June, so we are hoping that they are able to find enough nectar to build an adequate home for themselves.
If you are in the Farmington area, you can get honey for a good price at the Sandy River Farmers Market, online at http://www.westernmainemarket.com/ or at the Better Living Center. All is local, yummy, and costs less than what you get at the super market!

Needless to say, we were very late to the Tuesday farmers market, so if you were one of those waiting for us, we apologize!

That was the excitement of our week. Other than that, it has been rainy. I've been trying to combat the weed problem in the blackberry field, but it's really hard to do in the rain, not to mention, it's not very good for the plants.

Sunday, June 14, 2009

Rain drops keep fallin' on my head!

Yet another rainy week. I really can't complain, it is making the garden (including the weeds)grow very nicely! We have taken the washed out days to work in the greenhouses, which we have been ignoring since it has warmed up. So, with the help of two of our very hard working helpers, we weeded the entire tomato greenhouse, and strung up the tomato plants.. finally!


The tomatoes are looking great! We planted about 50 different varieties of tomatoes this year. Most of those are paste tomatoes, as Andy wanted to find the BEST paste tomato out there. We planted the tomatoes under the caller ties of the greenhouse, then hung baling twine from the caller ties. We bought tomato clips from Johnnys Selected Seeds, a bag of 500 for probably $15. Well worth it! We will string up the tomatoes as they grow. In the picture above, you can see my little basil plants inte-rplanted with the tomatoes. They are doing pretty well, but they are very hard to weed around.


Here is one of the first baby tomatoes, it is a Juliette Roma tomato. Andy says 3 more weeks until we have the first ripe tomato... I can't wait! Until then, the broccoli in our big greenhouse is calming my cravings for crunchy, fresh summer veggies. We have about 100 broccoli plants with beautiful broccoli crowns ripening. The best part about this broccoli is that it is too early for cabbage worms, so there will be no surprises in your steamed broccoli!


In other farm news, the chickens are doing wonderfully! They are loving being outside, eating all of the bugs and grass they could ever want. Their crops are so full that they wag whenever they walk. It's pretty fun to watch them. The ducks, on the other hand, are not doing very well. I have lost all of my drakes this spring. George to a heart attack, Perchutto to a fox, and now Buddy to a very strange disease that his girlfriend now has. I have Marla and Maggie left, and they are showing signs of this disease, so I am going to put them on antibiotics, put them of fresh ground every day, and clean clean clean up after them.

Also, I am looking to start a small flock of sheep for spinning wool. I have decided on Corriedales. I can't wait to find some and get started! So if you know of anyone who has lambs or ewes to sell, let me know!

Okay, here is a broccoli recipe. It is simple enough to add to any meal, yet is original enough to really stand out in any meal! Capers taste a bit like little green olives (yum!), and are easy to find at the grocery store. Also, the recipe says to peel the broccoli stems... if you buy fresh, local broccoli, you should never have to do this!!! Enjoy!

Sicilian-Style Broccoli

The Mediterranean Vegan Kitchen

1 Head Broccoli

2 Tbl. Extra Virgin Olive Oil

2 Large Garlic Cloves, finely chopped

1/2 C. Vegetable Broth

2 Tbl. Capers, drained and crushed

1/8 tsp. Red Pepper Flakes, crushed

Salt and pepper to taste

Cut off and separate the broccoli flowers. Trim the tough ends of the stalks; peel if necessary, and cut crosswise into 3/8 inch thick slices.

In a large skillet with a lid, heat the oil over medium heat. Add the garlic and cook, stirring until golden, 1 to 2 minutes. Add the broccoli florets and stalks, vegetable broth, capers and red pepper flakes. Bring to a simmer over medium-high heat. Reduce the heat to medium-low. Cover and cook until the broccoli is tender, but still firm, 5 to 7 minutes. Uncover, increase the heat to high, and cook, tossing and stirring constantly, until any remaining broth evaporates, 1 to 2 minutes. Season with salt and pepper. Serve warm or at room temperature.

Thanks for reading and eat well!!

Wednesday, June 3, 2009

Spring Salad Greens


Salad greens are growing abundantly in the outside gardens. The weeds have been conquered in most of the bed, and it is time to harvest! We have been growing salad greens in very large quantities for 3 1/2 years now (wow!). It was the first crop that we sold wholesale and our first customer was the Homestead Bakery in Farmington. At one point we were harvesting 40-60lbs a week. It was a great way to learn the basics of farming, and to get our name out there to retail customers.

All of our best lessons learned have been from the worst mistakes made on salad greens! We learned that there is nothing more valuable to the vegetables health then the addition of amendments to the soil, it could be compost, leaves, grass clippings, chicken, horse, sheep, rabbit or cow manure. Just as long as it goes into the soil the second a crop comes out of the ground.


This year we have decided to cut back on our salad greens production and focus on other parts of the farm, such as the commercial kitchen, and the mixed vegetable garden for the CSA members and Sandy River Farmers Market. Salad greens are very labor intensive and a lot can go wrong quickly. We are having much more fun with them now that we don't feel pressured to have a lot of salad greens all of the time!


Right now we have a 100 ft. row of greens that include red and green lettuce, mild mustards, baby bok choi, kale and arugula. We harvested half of the salad greens this week, and in 2 weeks from now the same plot will be ready for harvest again.


We use sheers to cut the greens like grass by the hand full, and throw them into a bin. Once we have harvested a little bit of many different varieties of greens, we mix them, then soak them in cold water for about 10 minutes.


Then we go through the salad mix one hand full at a time looking for imperfections in greens, weeds, and whatever may have made its way into the bin. We rinse the greens twice in cold water, spin them dry in a 7 gallon salad spinner, weigh them out and bag them. It takes us about 3 hours to harvest, wash, dry, bag and clean up for 20lbs of salad.
It is now available at the Sandy River Farmers Market! But it goes very quickly, so get there early!
Thanks for reading and have a great day!!

Wednesday, May 27, 2009

Planting Potatoes

It has been a crazy week (my sister so kindly reminded me that it is only Wednesday). Andy had a freak accident on Monday (more on that later), and I have had to do all of my normal work, plus all of the work that Andy does with his right arm (he's left handed, thankfully!) But the gardens are looking great and now it is raining. We got our summer Swiss chard, beets, carrots and potatoes planted in the back garden just as it started raining this morning. It has been a slow and steady shower since.

I thought I would write about planting potatoes today, since they are so easy and fun to grow! We have a few varieties that we have fallen in love with. The varieties that we are growing this year are kennebeck, red Pontiac, la rotte (fingerling), durango red, red thumb, russet, all red, all blue, yellow finn, kyuka gold, and our favorite variety, rose finn apple (A small fingerling potato that is absolutely delicious and beautiful).

The first step in planting potatoes is to find good seed potatoes. You can use potatoes that you buy from the store, but we have had much better results and found much more interesting varieties from seed potato vendors. FEDCO has "Moose Tubers" which you can find online, but the deadline to order has passed. We buy our potatoes from a local farmer and friend, he has great varieties and we like supporting him. He does have some potatoes left so if you are interested, let me know and I will get you in contact with him.

Cut the seed potatoes if they have a lot of eyes (probably more than 6). Cut into pieces that have more than 2 eyes each.


Plant the potatoes 3-4 inches deep with the eyes facing up, 1-2 feet apart in furrows at least 2 feet apart. As the season goes on we make sure to keep the weeds down, and hill the soil around the potato plants as they grow. Potato plants are gorgeous, I think. The leaves are dark green, blue or purple, and the flowers are white or purple with bright yellow centers.

Here's a yummy potato recipe that includes kale, a green that grows in abundance this time of year, and is extremely healthy! They are potato pancakes, great served with eggs and a veggie side dish. I apologize to my vegan friends, I really need to find recipes for you too!!

Cheesy Bubble and Squeek

3 Cups mashed potatoes

8 oz. shredded kale, steamed

1 egg, scrambled

1/2 C Cheddar cheese grated

Salt and pepper to taste

Mix the potatoes and kale, egg, cheese and spices. Divide dough into 8 pieces and shape into thick patties. Cool in the refrigerator for about and hour. Toss the patties in flour. Heat a few tablespoons of oil in a frying pan until hot. Slide the patties into the oil and fry on each side for about 3 minutes or until crisp. Drain on paper towels and serve hot.

Andy is healing well after his freak accident. He was walking through the garden on a blustery day when he turned around to see a piece of steel roofing boomeranging through the air at his face. He blocked it with his arm, but it still got his nose, just a half an inch away from his eye. It was incredibly unlucky that he was right there at that moment, but it could have been so much worse then it was. Here are a few pictures of his progress. His handsome face is slowly returning to its normal size. A tech at the hospital said that this was the worst broken nose she has ever seen! Poor Andy. He's such a trooper, he hasn't even taken a day off. To all of you who have offered your support, thank you so much!! Where would we be without our wonderful friends and family?


Thanks for reading!!

Friday, May 22, 2009

The Full Moon and The Frost...

Ahh Memorial Day weekend! This is a big weekend in agriculture in this state... Traditionally in Maine, this is the weekend to put frost sensitive plants outside, after they have been properly hardened off.

We have decided to put our plants out next weekend, since we still feel it is a bit early for where we are located. Plus, the full moon is only a few weeks away. At the Sandy River Farmers Market, I heard another farmer say "Full moon is on June 7th, we'll probably get a frost around then". When I first started farming I would hear it all of the time! I didn't understand, but it truly did seem to be that when the moon was full, it was colder. What is that all about anyway? So I decided to look into it.


I found many articles on the subject, but none scientific. Apparently, people believe that the heat of the full moon evaporates the clouds in the upper atmosphere. When those clouds have disappeared, there is no cover in the upper atmosphere to hold in the heat of the lower atmosphere, leaving us with colder nights down here on earth. I just don't believe this hypothesis. I could find nothing to back it up.


The closest I got to a scientific paper was on the MOFGA website: http://www.mofga.org/mofga/other/mofgs05f.html. By comparing the full moon cycle to temperature records from Houlton ME over the last 38 years, Mitch Lansky found that between May 18th and September 20th (the official growing season for Houlton), "only 26 out of the 232 days (11.2%) of full moons plus one day on either side coincided with frosts. The same period had 267 frosts out of 2280 days, so the chance of a frost on any day was 11.7 percent. Thus the coincidence of frosts with full moons seems to be random."


All of the other information that I read said the same thing. There really was no correlation between frost and a full moon. You know, I think that I will keep that to myself the next time Gramp says "full moon tonight, there will probably be a frost". Did he hear that from his father? Probably, he was a farmer on the same land that we are on now. Why spoil a perfectly harmless thing?

Monday, May 18, 2009

New Seeder

We got a new toy! It is the EarthWay Seeder and I love it!! It is so easy to plant and I can't wait for June 1st when we can plant our beans and corn because it is going to make our lives SO MUCH EASIER!!


I used it for the first time to plant Brussels sprouts (I know it's a little late).

Here is a picture of the EarthWay Seeder:


To use it we put the correct seeding plate in, then fill it with seeds. This plate spaced the seeds too close together, so I mixed 1 part Brussels Sprouts seeds to 2 parts radish seeds. The seed plate is the white disk.


Then I put down the row maker to mark the next row which was about 18" away. As I push the seeder and the wheels roll, the seed plate turns picking up (ideally) one seed at a time, then drops it into a shallow trough dug by a tiny plow behind the front wheel. The seeds are neatly spaced, and covered lightly by a chain that drags behind.


In other news, the Sandy River Farmers Market is going quite well. We are expecting to have other vendors arrive in the next few weeks with more perennials, vegetables and baked goods. It is open Fridays from 9am to 2pm and Tuesdays from 2pm to 6pm and is located in the Better Living Center/Movie Theater parking lot on Front St. in Farmington.
We have beet greens, kale, spinach, Bok Choi, Cilantro, Onions, maple syrup (a limited supply left), and lots of baked goods available!
Hope to see you there,
Eat Well!!

Monday, May 11, 2009

Rainy Day

It has been raining every day for the past... well, since the farmers market started up on May 1st. Our gardens are loving every minute of it. Not only that, but there has been a few bursts of sunshine, just enough to dry up the ground so we can walk through the gardens to check on our seedlings. Almost everything that we planted has germinated, except for some herbs. The beets in the outside garden are looking pretty good, sparse in some spots. The spinach has the first set of true leaves, and we are heading out to weed the mesclun mix as soon as I wolf down a hummus, spinach and tomato sandwich on whole wheat bread!


My next projects are to finish my herb garden, and fix up our display for the farmers market.


My herb garden is in major disrepair. It is very small, full of weeds, and needs some organization. This year, I am going to be planting thyme, rosemary, sage, tarragon, marjoram, oregano, mint (oregano and mint in a place where they can take over and I won't mind), dill, savory, lavender, basil.. and probably a few more things that I forgot. Here is a picture of a beautiful purple sage plant in my herb garden last year. I potted it up and brought in inside last fall, but there wasn't enough sunlight in our snow-cave for it to survive.

Sunday, May 3, 2009

Asparagus

We received our asparagus crowns yesterday! We got an order of 400 Jersey Supreme crowns from Nourse Seeds. We made out a bulk order with two other farmers in the area. These are the healthy crowns... Beauties, aren't they? The crown is up near my thumb, you can see the little nubbins that will soon be asparagus.


To plant the asparagus:
We spread a nice composed mixture of horse manure, sawdust and chicken manure, and some ashes from last winter using Doug's' (Andy's brother) tractor.


Andy rototilled using the tractor to get the manure and ashes incorporated deep into the soil. Then he used the push rototiller fitted with a furrow attachment to make the rows for the crowns. We made 4 rows; 2 rows 2 ft. apart, then a 5 ft space, then 2 rows 2 ft. apart.


At a spacing of 1 ft. apart, we spread each plants roots out in the soil, then covered them up so that the crown was just below the surface of the soil.

Once the asparagus has emerged, we will start mulching with whatever we can find to keep the grass out of the bed. The asparagus will not be ready to fully harvest until the spring of 2012. Andy pointed out that we will be 30 when we are able to fully enjoy the benefits of this planting! Even still, the asparagus ferns are so beautiful at the end of the summer with their bright red berries that hang off of the branches like Christmas bells. Hopefully next year we will have a small harvest of healthy, delicious asparagus!

If you are lucky enough to find some fresh asparagus at your local farmers market this spring, here is a recipe that looks absolutely divine! I found it in the new issue of Cooking Light Magazine. It suggests grilling the pizza, however I am sure you could put it in the oven just the same. It seems like a pizza peel would come in very handy if you do decide to use the grill. Have fun!!

Grilled Pizza with Asparagus and Caramelized Onion
Cooking Light Magazine

1 Tbl. extra-virgin olive oil, divided
2 C thinly vertically sliced onion
2 C (2-inch) slices asparagus (about ½ lb.)
1 Tbl. thinly sliced ready to use sun-dried tomatoes
⅛ tsp. salt
1 (8-oz.) portion fresh whole wheat pizza dough.
¾ C (3 oz.) shredded fontina cheese
1½ tsp. fresh oregano leaves
¼ tsp. freshly ground black pepper

1. Prepare grill to medium-high heat.
2. Heat 2 tsp. of olive oil in a large non-stick skillet over medium-high heat. Add onion to pan; sauté 5 minutes. Reduce heat to medium-low; cook 5 minutes or until browned. Add asparagus to pan; cook 5 minutes or until asparagus is crisp-tender. Stir in tomatoes and salt.
3. Roll dough into a 12-inch circle on a lightly floured surface; brush each side of dough with ½ tsp. remaining oil.
4. Place dough on a grill rack; grill 1½ minutes or until crust bubbles and is well marked. Reduce grill to low; turn dough over. Arrange onion mixture over crust; sprinkle evenly with cheese. Cover and grill over low heat 3½ minutes or until cheese melts; remove pizza from grill. Sprinkle with oregano and black pepper.


Thursday, April 30, 2009

Farmers Market Tomorrow!!


Two days ago it was 89 degrees on the farm. Last night we had to cover the tomatoes in the greenhouse to keep them from getting frost nipped. Is this a typical spring in Maine? I think so. Maybe a bit warmer then normal. Just a little dramatic! The hot weather has produced some beautiful spring flowers. These are just a few of many daffodils that Weslene has planted on the farm. She has gorgeous flower gardens!


We have been very busy the last few days preparing for the first Sandy River Farmers Market. The Market season opens tomorrow morning! We will be open on Fridays 9am to 2pm and Tuesdays 2pm to 6pm May through October on Front St. in Farmington. For tomorrow we have a few veggies; parsnips, spinach, onions and maybe carrots (if we can get our butts in gear early enough tomorrow morning). We will also have maple syrup, eggs, and baked goods including bread (anadama, whole wheat, oatmeal, multi-grain, and cinnamon raisin) cinnamon rolls, and cookies. I was going to make a carrot cake with cream cheese frosting, but that will have to wait until next Tuesday.


We have accomplished a lot in the last week. We planted our onion sets and starts. Here is a picture of our onion starts. Before the weeds start sprouting, we need to mulch. We will also need to side dress with chicken manure tea before the season is up.

We also planted the rest of the broccoli and tomatoes in the greenhouse, weeded the tomatoes in the small greenhouse, plowed under "The Three Corner Piece"(which will add about an acre to our garden space). Started all of our cucurbits (pumpkins, squash, cucumbers, melons etc.). Okay, so I say we, but I think so far Andy has done all of the items on this list.


This weekend we are planning on going over to visit the Norcotts to build top bar bee hives! I am so excited, I love seeing the bees at work. I also love their honey! We will post pictures and let you know how it went!
Hope to see you tomorrow!!

Friday, April 24, 2009

Spring Treats

This time of year there are only a few fresh vegetables to choose from. On the farm, greens, parsnips, and storage vegetables are available. By now, we have used up our canned veggies and are eagerly awaiting the fresh.

Here is a recipe for a nice frittata, which is pleasing any time of day. It makes an especially nice light supper at the end of a long day. I serve it with steamed carrots and warmed up bread. We caramelize some onions before adding the greens.

Enjoy!

Mixed Greens Frittata
Moosewood Restaurant New Classics

2 C chopped greens
¾ C chopped fresh parsley
¼ C chopped fresh basil
1 ½ tsp extra virgin olive oil
4 eggs, lightly beaten
¼ C water
¼ tsp salt
½ C grated feta, Parmesan, mozzarella or cheddar cheese

In a 10 inch ovenproof skillet, stir-fry the greens, parsley, and basil in 1 tsp of the oil until wilted and tender. Transfer the greens to the bowl. Rinse the skillet and set aside. In a separate bowl, whisk together the eggs, water and salt and stir in ¼ cup of the cheese.

Lightly oil the skillet with the remaining ½ tsp of oil and place it on med-high heat. Stir the egg and cheese mixture into the greens and pour into the hot skillet. Sprinkle the top with the rest of the grated cheese. Lower the heat to med-low and cook, without stirring, until the edges are firm and pulling away from the sides of the pan, about 5 minutes. The frittata should be mostly cooked, but with the top still lightly undercooked. Place the skillet under the broiler for 3 to 5 minutes, until the top is firm and beginning to turn golden brown.
Cut into wedges and serve, either directly from the skillet or turned out onto a large plate.

Wednesday, April 22, 2009

Learning from mistakes

This year we have a lot of orders to fill. From CSA members to Farmers Markets, I would say we have about double the amount of of work as last year. The number one lesson I learned last year was that less is more. If we had only had a smaller garden, we would have had more time to take care of it all. Our onions were great, tomatoes were even better, but two patches of carrots went unharvested. They were too small to bother with because we didn't have time to weed and thin. So the weeds grew ever higher, and our excitement to deal with it diminished. This was the back garden which we are planting into a cover crop this year. Everything back there was pushed aside as we dealt with the other gardens.


So this year, I am planting new secession crops only after I have the first secession taken care of. Once my baby carrots have germinated, and I have thinned and weeded them, we will plant the next bed of carrots. That's the idea anyway. Most of the time it is easier said then done.


We have planted a 105 ft. Row of Salad Mix (covered with Remay to keep flea beetles off of it), 50 ft. row of beets (Golden beets will have to wait until it warms up a bit more), 9 ft. of baby carrots, and 50 ft. of spinach, a few spring onions, and some herbs. This is a picture of the blackberry field where we are planting a majority of our crops this year. In the distance you can see 3 of the four greenhouses. Above the garden is a good sized blackberry patch.
In other great farm news, we just got our Earth Way Seeder from the UPS man! That will make planting a much quicker task!

Saturday, April 18, 2009

Breaking Ground

It's been so beautiful, I feel grateful to be able to work outside all of the time. Yesterday we got our peas planted. We rototilled half of the pea patch, but the other half was soft enough to rake. We need to do a better job at mulching this year. The old greenhouse is ready for tomatoes! The chickens did a great job, and the soil looks wonderful. We just need to protect them from the chilly nights with double coverage.

This year I have three personal garden goals:

1.) successfully grow celery : I have already killed the celery that I started, so unfortunately I don't think this goal will be met!

2.) Try companion planting: Companion planting "involves the influence of some crops on others and the arrangements of different species according to their ability to enhance or inhibit each other's growth." (Anna Carr Good Neighbors: Companion Planting for Gardeners).
So I will try interplanting basil with tomatoes. This should work for us since we tie our tomatoes up on strings hanging down from the greenhouse. Supposedly interplanting basil with tomatoes makes the tomatoes taste even better (we'll be doing taste tests with our customers!) but to me, it just seemed like a great use of that space between tomato plants. I also planted radishes with my peas.

3.) Get the back garden under control!: This is a big task. In order to acheive this we are doing a few things. First, we are planting a low growing green manure crop such as clover with wheat. The garden isn't that big, so our idea is to leave the garden fallow for this year, harvest the wheat, till it all under and our garden will be as good as new! Well, that's what we're hoping anyway. But then there's my little section of the garden that I've been nursing. Using an idea that Paula told me about, I've started collecting leaves, dried grass, and any other mulching materials that I have laying around from last fall. I have been piling them up under a piece of clear plastic with the hopes of getting it warmed up enough to kill some of the weed seeds. Then, the plan is to plant started seedlings in the mulch. The soil is pretty good, since we have tilled in a lot of carbon in the form of horse manure and shavings, and nitrogen in the form of chicken manure. It's a work in progress. I have pictures of the before, I'll post them with the "after" pictures when we get to that point!

As for the parsnips, I still haven't tried them... maybe tonight!

Eat well!

Thursday, April 16, 2009

Greetings!

Greetings to you all!

It is another glorious spring day here in Farmington. I should be out in the greenhouse, or perhaps planting those peas that I said I would get into the ground a week ago. But no, I am writing my first blog.

I have big plans for this blog. I will be posting what we have available on the farm, recipes, pictures, gardening tips, and just your everyday farm gossip.

Here's where we are in our growing season:

We have 3 greenhouses. This winter we had chickens living in two, eating grubs and seeds, and leaving us "chicken truffels" as my mom calls it, or fertelizing the ground for us. One greenhouse is now empty and the soil has been rototilled. Tomatoes and Basil will be going in tomorrow. The other still has chickens in it. The last greenhouse has spinach, beets, bunching onions, salad mix and seedlings in it. The greenhouses are unheated, so the tomatoes and other cold sensitive plants need to be covered with row covers, and we lose sleep on the really cold nights worring that they will freeze.

The snow has melted and the soil has thawed, so we were able to harvest parsnips yesterday. I have never tried parsnips before, so that's what we're having for supper tonight. I'll let you know how they turn out.

Other then that, garlic is poking through the hay, and peas need to be planted.

Thanks for reading!

Eat Well!